Merry Christmas!
Sunday, December 22, 2019
Saturday, August 11, 2018
Candy Card Instructions
![]() |
| Cut with decorative scissors |
![]() |
| Curve top with scissors. Insert candy or battery tealight to shine through a vellum card. |
![]() |
| Die cut circle folded over |
1) Cut cardstock to 2 3/4" x 8 1/2" and score as shown at 3 3/4" and 4 3/4". You'll get 4 per sheet of
8 1/2" x 11" cardstock.
2) Stamp the front design and be sure to add a sentiment on the reverse side!
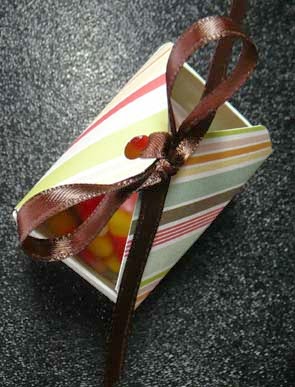
3) Fold and insert a 2" x 3" reclosable bag filled with your treat. (These are available at craft stores, generally near the beading supplies.)
4) Using a hand punch, punch holes through all layers of cardstock and the top edge of the sealed bag.
5) Tie with ribbon and then cut the top decorative edge as desired. The Candy Card page in our Card Gallery shows many different ways to finish the top. Be creative! If you use a die, make that cut prior to step #4.
Friday, July 20, 2018
Retirement from Show Travel
Grateful,
Thankful,
Blessed
we have been
to travel the past 20 years to conventions across the country.
We have
completed our 2018 convention schedule and this was our final year to travel to
conventions, but you will continue to find your favorites on our website.
If you are not
already on our
e-mail list,
please sign up today by
e-mailing
pam@morningstarstamps.com.
Monday, July 13, 2015
Ghirardelli Candy Holder
This cute little holder for a square of Ghirardelli candy was easy to make with a few scored lines and some tape. The tag features our new Holiday Calories Don't Count stamp, 178, which I embellished with a die cut snowflake.
I used a 4 5/8" scalloped circle die (from the now discontinued Spellbinders Grand Scalloped Circles Nestabilities Dies) and scored to fit the candy.
Happy stamping!
Pam
Halloween French Fry Box
I recently purchased a French fry box die and found it is the perfect size to use our circle stamps as an embellishment. I used our Halloween circle, I09, and the cute tag on top features our new Eat Your Vegetables stamp, C35. Who wouldn't love a bag of candy corn with dry roasted nuts for a snack. Yum!
Happy stamping,
Pam
Wednesday, June 24, 2015
Reindeer Candy Tube
Our new reindeer noses stamp, C36, paired with our reindeer stamp, E137, makes an adorable tag to add to the candy tube filled with Whoppers and Atomic FireBalls.
The mission to purchase Atomic FireBalls led me to 8 stores with no success and finally the 9th store, Hobby Lobby, was a success. If you don't have a Hobby Lobby, I found a candy called Cherry Sours at Target and also at a Jelly Belly bulk display that are similar in size to the FireBalls.
Our new fall designs will be online tomorrow. It's never to early to start planning!
Happy stamping,
Pam
Wednesday, May 27, 2015
Word Search
Our new word search stamp can be used for at least 12 different occasions. Here is the guide we have on display at the shows showing the hidden words.
Our card gallery features several new cards using this fun new design.
Happy stamping!
Pam
Friday, September 19, 2014
Snowman Treat Pouch
Front and side view of this fun little treat pouch -- another cute project to make with our
E149 Snowman face.
Start with a 5" x 5" piece of lightweight cardstock and add the patterned papers and face as shown below.
.
I inked and stamped one dot from the face to make the buttons. B06 Holly was stamped in black and colored in with green and red.
The green strips are 5/8" x 7/8" x 5" and the red belt is 5/8" x 5" plus a piece for the tie. Black embroidery floss is the fringe.
On the reverse, use adhesive on the side back edge and the top edge and the bottom edge. First attach the side forming a cylinder. Glue the top edge flat, taking care to not let the bottom glue shut. Insert treat and then fold the body the opposite direction and seal the bottom.
A crimper is cute used on the top and bottom edges if your paper is not too thick.
Happy Stamping!
Pam
Thursday, September 18, 2014
Silent Night Card
I used my Silhouette to cut this tree and then stamped in a dark green with our O03 Silent Night stamp. Our new H132 Silent Night with Stars is stamped in the same green. Add some pretty layers and a twine bow to complete this card.
Wednesday, September 17, 2014
Boo to You
Our vellum candy card became this cute ghost treat so easily. I used an oval die to round the top, added wiggly eyes and stamped our C21 Boo to You on the reverse in black and embossed.
A79 Trick or treat was the perfect sized stamp to make a little bag - the handles are quilting thread.
Add a bag of white treats and tie with a cute bow. These are quick to make and so cute!
Happy stamping!
Pam
Tuesday, September 16, 2014
Snowman from Framelits die
It's always fun to find more ways to use our 'stuff' and this cute snowman was cut with the Sizzix framelits Easter egg die set. I stamped our E149 Snowman face in black and embossed with clear embossing powder and colored his nose with a Copic marker. To emboss the swirls leaving the face untouched, I made an embossing diffuser to custom fit our face. I used four pieces of 4 1/4" x 5" cardstock (80#) and cut 1 1/2" circles in the same exact spot on each piece and taped the 4 pieces together.
The branches were from a Memory Box Woodland Branch die.
A torn piece of flannel completed the card.
Happy stamping!
Pam
Monday, September 15, 2014
Father's Day Candy Bar Wrapper
This cute wrapper has a Hershey's bar hidden inside. Simply make the jacket according to the sketch below.
Cut and score as indicated, fold and add the little pocket flap and handkerchief, and tiny brads for the buttons. I used a corner rounder for the bottom flaps.
The shirt is also a holder for the candy bar and is made as follows.
Cut and fold the shirt and stamp our G33 Tie stamp on patterned paper, cut out and attach under the collar edge.
Here's how it looks from the reverse with the candy bar inserted. I taped down the flap on the candy bar to not distract from the shirt.
Insert inside the jacket and tie shut with a ribbon to which I added a tag made with our D59 Father's Day stamp.
Cute presentation for a sweet treat!
Happy Stamping,
Pam
Wednesday, August 20, 2014
6" x 6" Treat Holder
This little treat holder is so easy to make. Just score a 6" x 6" piece of cardstock and punch holes as show below. Tie and fill with your treat. How quick and easy was that.
Our H114 Bunny front with a fuzzy pom pom tail and pink glitter ears made a cute spring embellishment.
Now I'm wanting to make one with fall papers for Halloween or Thanksgiving treats. If you make one please post it to MorningStar's Pinterest Page to our Customer's Creations board.
Happy stamping!
Pam
Tuesday, August 19, 2014
Instructions for Cocoa Mug
Here is the mug that I posted in April and now it's August and I'm finally posting the instructions.
I stamped our S06 Mug twice in clear and embossed with clear embossing powder. I cut flaps and scored making a 1/2" fold on the left one which becomes the back of the package. The cup on the right will become the front. The inside of the handle needs cut out as well.
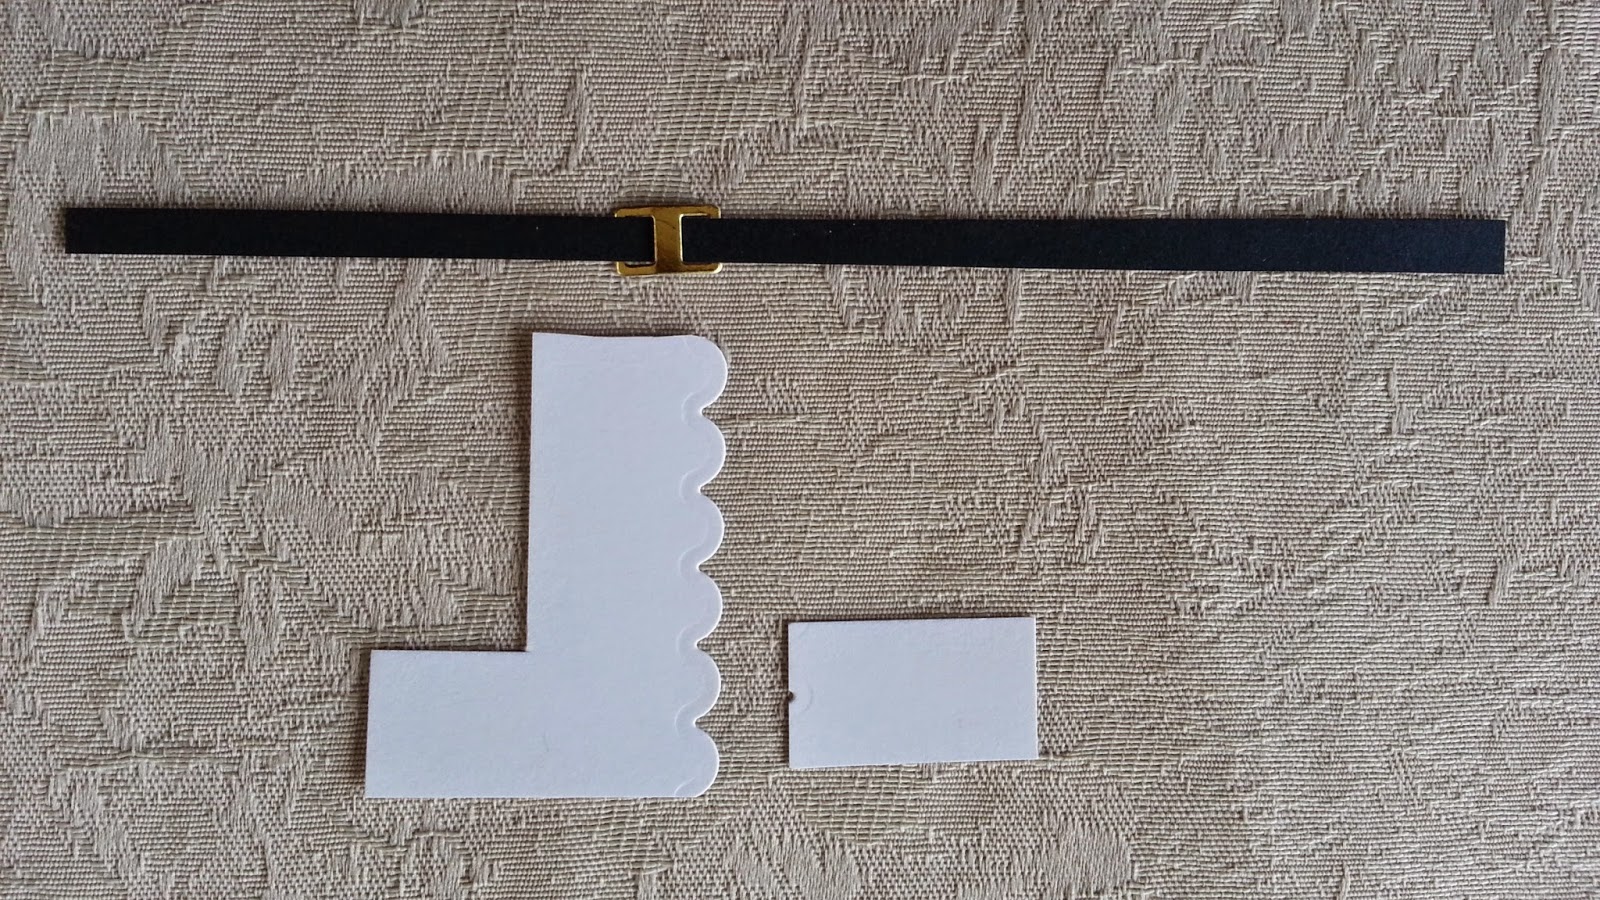
Black cardstock was cut to fit through a buckle die cut from gold shiny cardstock (I used the smallest buckle in the Memory Box Simple Buckles set).
Attach the white pieces and the belt and then add buttons (I stamped mine using one of the dots in the E149 Snowman face as it was just the right size.)
When the front is finished, attach the back and fill with your cocoa packet.
It's in the 90's here today and hot cocoa doesn't sound too inviting but cooler days are coming, so get busy on those fall projects now!
Happy stamping!
Pam
Sunday, August 3, 2014
Being Organized
A fun little card made with tiny punched file folders and our F131 Organized People stamp. I personally love file folders and notebooks and To Do lists so this card just makes me happy.
Happy Stamping,
Pam
Saturday, August 2, 2014
Cookie Box and Tag
I think making cute things to give as a surprise to someone are so fun to make. Imagine finding this on your desk some morning?
Whether you give one or dozens of cookies to someone, this little tag using our new E168 By the Dozen stamp will be a perfect tie on.
I created this little box using the Envelope Punch Board....can you tell I have a new toy? The circle is 2 3/4".
Remember customers are invited to post to the Customer's Creations Board on Morningstar's Pinterest page.
Happy stamping,
Pam
Friday, August 1, 2014
Christmas is Coming
How cute is this little tag? Wouldn't you love it if you had these all made and ready for packages in December? Well, gather a few supplies, and crank down the air conditioning some afternoon and make a bunch of these. Our new B55 Top Hat was designed for this project. It fits perfectly with our B50 Snowman face. Stamp the hat and cut it out. Then add it and the paper 'ribbon' trim to a 3" circle with the face stamped and colored. Attach a loop to the back and then glue a second 3" circle on back to hide the loop end.
Happy stamping,
Pam
Thursday, July 31, 2014
Count Your Blessings
Thanksgiving is one of my favorite holidays and this cute little favor was made with the Envelope Punch Board. Our new F153 Count Blessings stamp made a perfect embellishment for the front. I really love all the possibilities for this little stamp.
Happy stamping,
Pam
Wednesday, July 30, 2014
Wishing You Happiness
New stamps always make me happy and this little candy card is cute and easy to make. Wouldn't this brighten someone's day?
New stamps used were C32 girl glasses and F154 Everywhere you look. A80 whimsy birthday stamp matches the new sentiment.
Happy stamping,
Pam
Tuesday, July 29, 2014
New Fall Sample Cards Coming Soon
This cute little tree is part of our Fall 2014 line to be released in August. The die is Chesapeake Circle from Memory Box which has recently been discontinued.
More coming soon....
Pam
Subscribe to:
Posts (Atom)